My husband and I are stalking a house a few blocks away. We are always finding reasons to add it to our route even though it’s out of the way of most anywhere we go. There’s all kinds of things to admire there, from the landscaping to the pool area that we peek at over the fence from the alley. We dream of having this kind of spot someday but for now it’s baby steps.
One of the things we love in their yard are concrete landscaping balls. They are a contemporary and interesting addition to the flowerbeds. Already weary of what it might cost in shipping alone, I jumped online to look for them and realized shipping was the least of my concerns. A 9″ ball was $30 and an 11″ version was $50. I didn’t even look at what it would cost to get them here. Obviously I needed a new plan.
My husband is a pretty resourceful guy so we started brainstorming. We bought a hard rubber ball, made up a batch of concrete, cut a little slit in the top and poured it in. The plastic relaxed into this blob and the rubber started tearing. Back to the drawing board.
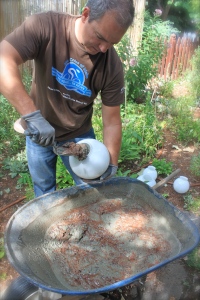
Then we realized glass globes – the type that go on light fixtures – might work. They would have the needed rigidity, already have a hole in the top to put the concrete and could be broken once the cement was set. So off we went to the thrift store (we have a great place here in Boise called Second Chance – a clever name for a place that gives construction materials a second chance as well as those recovering from substance abuse) and picked up globes for about half the cost of the local hardware store ($5 for the larger ones, 3 for $10 for the smaller) and got started.
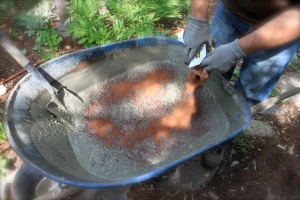
First you’ll need some quick setting concrete (approximately $7 for 80 lbs).
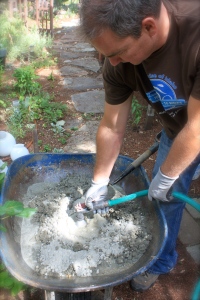
Add a little water at a time (easy does it – you can always add more water but it’s hard to taketh away), stirring to mix.
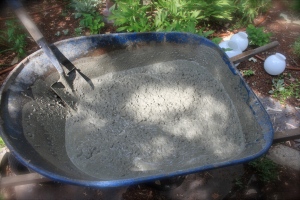
You’ll want the mixture a little soupier than you would normally for concrete. If it’s too dry, the outside of the spheres won’t be smooth.
This next step is optional but we thought it would be fun to get all fancy and add some color to our creations. We picked this up at Home Depot when we got the concrete and there were several colors to choose from ($7).
By not stirring it in completely, there’s a swirled look to the final piece that I really like. Obviously the amount of color and how much it’s mixed in is easily customizable.
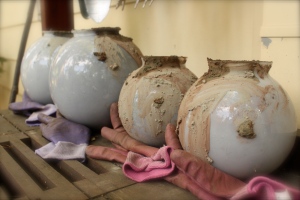
Next grab the globes and coat them generously inside with non-stick cooking spray. Then load ’em up with the concrete mixture, jiggling to make sure to get the air pockets out, and prop them up in a spot to dry – for me that was my potting bench to keep them out of the sprinklers, corralled by garden gloves so they wouldn’t roll away.
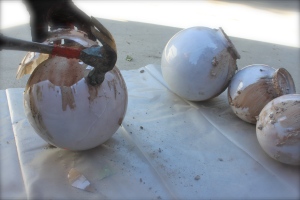
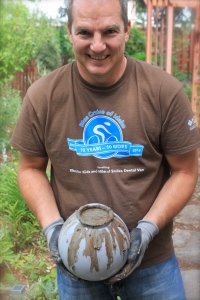
Give it a couple days (taking into consideration temperature and humidity) and then tap the glass carefully with a hammer and remove.
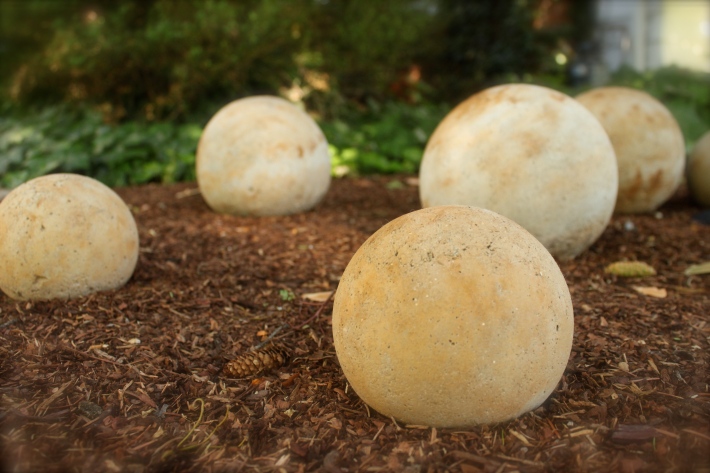
For under $35 we made five concrete landscaping spheres. It was fun, easy and took very little active time – plus now we have the pride of saying we made them ourselves (it’s quite the conversation starter).
Now if we could just figure out such a simple solution to getting the pool!



Nice. Which house is it?
Sue Dahlgren, Realtor Group One Sue@SueDahlgren.com http://www.SueDahlgren.com cell: (208) 867-6949 fax: (208) 780-7722
Want to search properties the way I do? Visit My website http://www.suedahlgren.com/mls-search/ to set to set up your own access.
It’s on the east side of 23rd down by Ellis. Shhhhh. Don’t tell them that we’re stalking them…
I heard about this project of yours. Love it! Looks like a complete success.
Yeah… it’s pretty slick… now if I could just find bigger globes! We tried to use a large kids ball as a base and skim over it with a grout-like mixture, but that didn’t work at all.
If you ever make it to Boise (I read that you were recently in Victor), I’d love to meet you sometime.
So cool! We were looking at those spheres in a garden center today and they were $50 – $80 each! Thanks for the great idea!
Terrie! It’s crazy how much they want for them at the garden center isn’t it? And they are so simple and fun to make, soon all your friends will want you to make them for them too! Hope you make a bunch and love them as much as we do. Thanks for the comment.
What a cool idea..and a great use of Blue Cruise T shirt! Maybe on John’s ToDo list for post BSU..justs keeps getting longer and longer!
Keep that boy busy! 🙂